A functional tail light bulb is essential for your safety while driving. It enhances your vehicle's visibility during low-light conditions or in harsh weather. This way, other drivers can spot you easily, preventing rear-end collisions.
In contrast, driving with a blown tail light bulb jeopardizes every road user's safety. Therefore, you must immediately replace a blown-tail light bulb to prevent accidents. At Sunset Cadillac of Venice car dealership, we provide high-quality auto parts, including tail light bulbs designed for various makes and models.
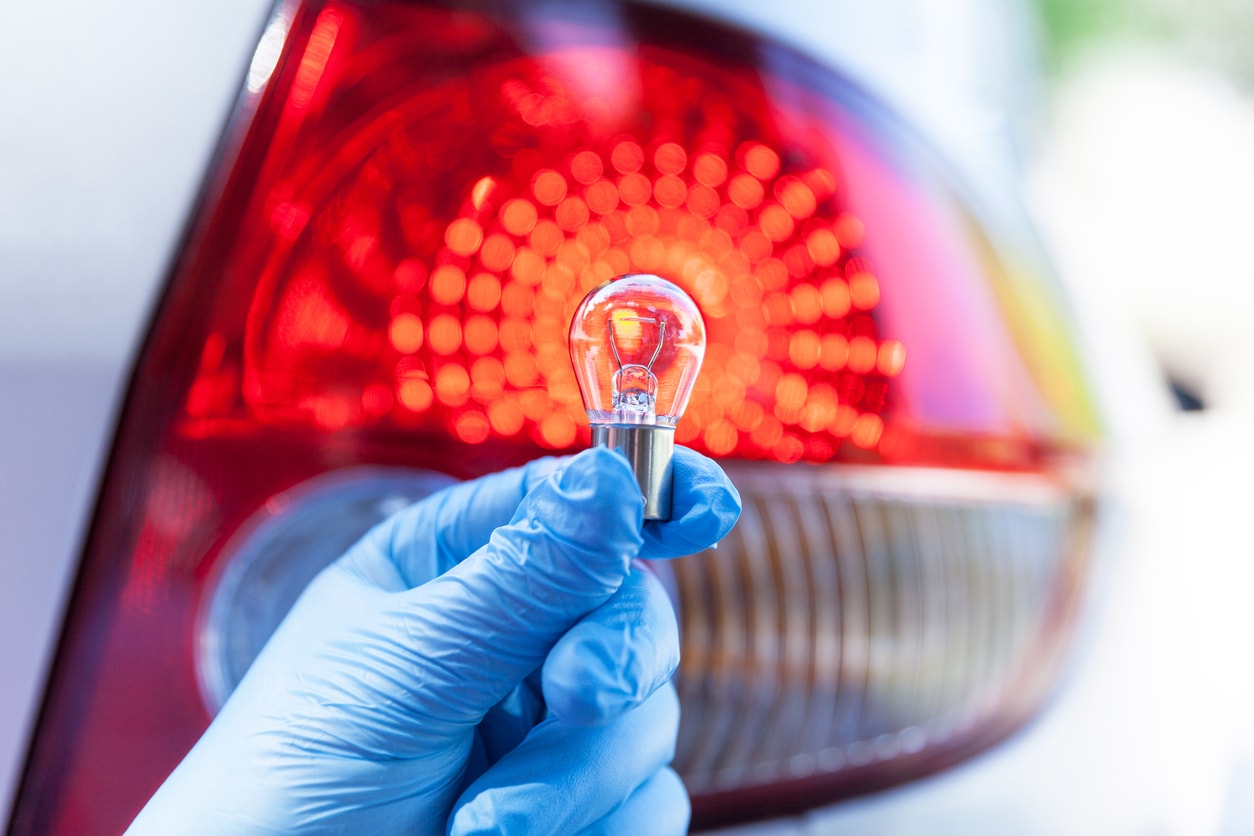
Read on to learn how to replace a blown tail light bulb easily.
Common Causes of a Blown Tail Light Bulb
Here's a quick rundown of the common causes of a blown tail light bulb.
-
Bulb burnout.
-
Electrical issues like short circuits, loose connections, or excessive voltage.
-
Weak or broken filament due to vibrations from driving on rough roads.
-
Moisture and water intrusion into the tail light bulb assembly.
-
Rear collisions with other vehicles.
DIY vs. Professional Assistance
Depending on the cause, replacing a blown tail light bulb can be a DIY task or require professional assistance. For the most part, you can replace the blown tail light bulb in under an hour. However, you should seek professional help from a mechanic for complex electrical components issues.
Step-by-Step Guide to Replacing a Blown Tail Light Bulb
Here is how to replace a blown tail light bulb.
Step 1: Gather the necessary tools and replacement bulb
Assemble the required tools and materials to complete the task, e.g.,
-
Gloves
-
Screwdriver
-
Googles
-
A replacement tail light bulb
In addition to gathering the required materials and tools, remember vehicles are different and vary by type, brand, and model. This should guide your choice of replacement tail light bulb and installation. Also, your safety must come first. So, disconnect your car battery to prevent shock or electrocution risks while changing the blown tail light bulb.
Step 2: Locate the tail light assembly
You'll find the tail light assembly on the vehicle's rear, either on the trunk lid or the rear fender. But it can vary depending on your car's make and model.
Step 3: Remove the tail light cover or access panel
Depending on your car's make and model, removing a cover or access panel to access the tail light bulb may be necessary. Use the screwdriver to loosen and remove the nuts holding the cover.
Step 4: Identify the blown bulb and disconnect it
Inspect the tail light assembly to identify the blown bulb, then turn it counterclockwise to remove it from the socket. Only apply enough force so you don't break the bulb or hurt yourself if it's broken.
Step 5: Set the new tail light bulb
Insert the new tail light bulb into the empty socket and twist it clockwise until it fits properly.
Step 6: Reassemble the tail light assembly
Use a screwdriver to tighten the tail light assembly fasteners and to prevent loose components.
Step 7: Test the newly replaced tail light
Connect the car battery back, then turn on the headlights to check if the newly replaced tail light bulb is functioning correctly. Step out or have someone observe the rear of your car to verify the light illuminates correctly. Consider consulting a professional mechanic if the bulb doesn't light as expected.
Choosing the Right Tail Light Bulb
The primary considerations when choosing the right tail light bulb for your car are compatibility, wattage, and durability. You can find a new tail light bulb online or from your local auto parts store. However, the most effective way is to head to the Sunset Cadillac of Venice online shop.
Place your order here for the best tail light bulb for this task.